Beginner’s Guide to
Proper Squat Form
Avoid These 7 Common Mistakes
Everything you need to know to squat safely, effectively, and with confidence — from setup to common form breaks and how to fix them.
Walk into any gym on any given day and you’ll see it — the squat being performed badly in a dozen different ways. Knees caving inward, heels lifting off the floor, chests collapsing toward the thighs, backs rounding under load. Beginners doing it wrong because nobody showed them right. Sometimes even experienced lifters carrying bad habits they picked up years ago and never corrected.
None of this is judgment. The squat is one of the most mechanically complex movements in the gym. It demands simultaneous coordination of the ankles, knees, hips, and spine — all under load, all at the same time. Learning it properly takes some time and attention. But here’s the thing: once you understand what good form actually looks like, and why the common mistakes happen, fixing them is far more straightforward than most people expect.
This guide is for anyone who has ever looked at a squat rack and felt uncertain. We’ll cover the anatomy of a proper squat from the ground up, walk through every significant form break that coaches see beginners make, explain exactly what’s going wrong biomechanically, and give you the cues and fixes to correct each one. By the end, you’ll have everything you need to squat with confidence and safety.
Before we get into the mistakes, let’s establish what correct form actually looks like. You can’t diagnose a deviation from a standard you haven’t clearly defined.
What Proper Squat Form Actually Looks Like
Good squat form is not one-size-fits-all. Your anatomy — the depth and angle of your hip socket, your femur length, your ankle mobility — will influence your individual mechanics. But the following checkpoints apply universally. If you’re hitting all of these, you’re squatting well.
Foot Position
Feet roughly shoulder-width apart, toes turned out 15–30 degrees. The exact width varies by individual anatomy — wider stances suit people with broader hips, narrower stances suit those with shallower hip sockets. The rule of thumb: your knees should track over your toes throughout the movement.
Brace Before You Move
Before descending a single inch, take a deep breath into your belly (not your chest), brace your core like you’re about to be punched in the stomach, and squeeze your glutes. This creates intra-abdominal pressure — your body’s natural weight belt — and protects your spine under load.
Descent: Hips Back and Down
Initiate the squat by pushing your hips back and simultaneously bending your knees. The movement is neither a pure sit-back (like a box squat) nor a pure knee-forward drop. Think of it as hinging and bending together, keeping your weight evenly distributed across your whole foot — not pushed forward onto your toes or back onto your heels.
Depth
The goal for most people is to squat until the hip crease (where your thigh meets your hip) drops below the top of the knee. This is commonly called “breaking parallel.” Going to this depth ensures the glutes and hamstrings are fully recruited. Squatting shallow is one of the most common ways to reduce the exercise’s effectiveness while simultaneously increasing knee stress.
Spine Position
A neutral spine — natural curve preserved, not rounded or hyperextended — must be maintained throughout. Your chest should stay proud and your gaze slightly forward or down at about a 10-foot spot on the floor. The moment your upper back rounds or your lower back loses its arch, depth needs to be reduced until mobility improves.
The Ascent
Drive the floor away from you with both feet. Think “spread the floor” with your feet (without actually moving them) — this cue activates the glutes and external rotators and prevents knee cave on the way up. Drive through the whole foot, maintain your brace, and lock out completely at the top before the next rep.
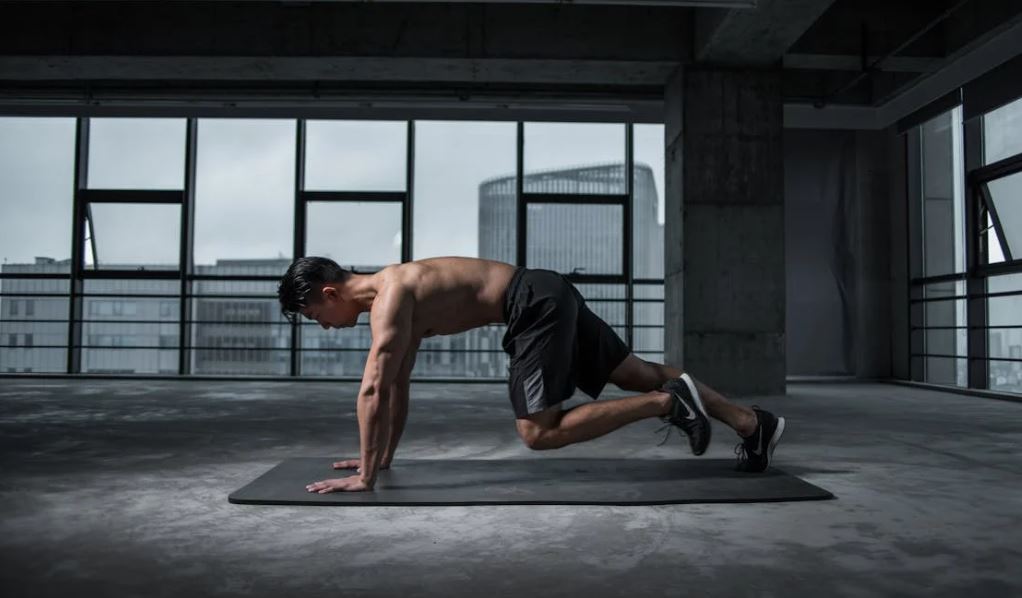
Below are the seven form errors coaches see most frequently — from complete beginners all the way up to intermediate lifters who’ve been training for years. Each one has a clear cause, a clear consequence, and a clear fix.
Knee Cave (Valgus Collapse)
This is probably the single most common squat error — and one of the most dangerous. Knee cave happens when the knees fall inward on the descent or, more typically, on the drive upward out of the bottom of the squat. It looks like the knees tracking toward each other rather than staying in line with the toes.
The cause is almost always a combination of weak glutes (specifically the gluteus medius and hip external rotators) and poor motor pattern — the nervous system simply hasn’t been taught to keep the knees out. In some cases, limited ankle mobility contributes by forcing compensations up the chain. Repeated valgus under load places significant shear stress on the knee ligaments — the ACL is particularly vulnerable — and is a well-documented mechanism of knee injury.
Heels Rising Off the Floor
If your heels come up during the squat, your ankle mobility is limiting your depth. The ankle needs to dorsiflex — the shin must be able to travel forward over the foot — to allow a deep squat. When that range of motion isn’t available, the body compensates by lifting the heel to give the calf the slack it needs.
This shifts your entire center of mass forward, loads the forefoot excessively, compromises your balance, and puts your lower back in a compromised position. Many beginners put plates under their heels as a workaround — and while this can be a useful short-term training tool, it doesn’t fix the underlying mobility limitation that’s causing the problem.
Chest Collapsing Forward (“Good Morning” Squat)
Watch a beginner squat at any point in their fatigue curve and you’ll often see the torso pitch dramatically forward — turning what should be a squat into something resembling a good morning exercise. The hips shoot up first, the chest dives toward the floor, and the lower back takes the strain.
This happens for two main reasons. The first is insufficient upper back and core strength — the muscles responsible for keeping the torso upright simply aren’t strong enough to hold position under load. The second is the weight being too heavy, which exposes the weakness. It can also result from poor bar position in a back squat (bar sitting too high and rolling forward) or from initiating the descent by sending the hips back too aggressively without the corresponding knee bend.
Squatting Too Shallow (“Quarter Squatting”)
A quarter squat — where the athlete descends only partway, nowhere near hip crease below knee — is one of the most pervasive form errors in commercial gym settings. It feels harder than it looks, which fools athletes into thinking they’re getting a complete training stimulus. They’re not. A shallow squat primarily loads the quadriceps through a limited range, largely bypasses the hamstrings and glutes, and actually places more stress on the knee (specifically the patellofemoral joint) relative to the muscular work being done.
Quarter squatting typically stems from ego — more weight can be moved through a partial range — or from limited hip and ankle mobility that makes depth genuinely difficult. The fix is different depending on the cause, but the destination is the same: full depth, consistently.
Lower Back Rounding (Butt Wink)
The “butt wink” — the posterior tilting of the pelvis at the bottom of the squat — is a topic of ongoing debate among coaches, but the consensus is fairly clear: a small amount is normal and harmless; a large, pronounced rounding of the lumbar spine under load is a problem. When the lower back loses its neutral curve at the bottom of the squat, the intervertebral discs are exposed to compression and shear in a compromised position.
The cause can be hip anatomy (some people’s hip sockets simply don’t allow the necessary range of motion for very deep squats), limited hip flexor and hamstring flexibility, or genuinely insufficient hip mobility. The honest answer is that some people will always have some butt wink at the very bottom — and for those people, squatting just above the point where it occurs is the correct depth to train.
Not Bracing the Core
Many beginners don’t brace at all — they simply hold their breath vaguely or breathe normally throughout the movement, trusting their back muscles alone to support the spine. Under light loads, this can go unnoticed. As weight increases, the absence of a proper brace becomes a significant injury risk factor and a performance limiter.
The Valsalva maneuver — a sharp breath into the belly before initiating the descent, held throughout the movement, released at the top — is the gold standard for creating intra-abdominal pressure. Think about your trunk as a sealed cylinder: pressure on all sides keeps the spine in a neutral, supported position. Without that pressure, the spine relies on passive structures (ligaments, discs) to do work that active muscular bracing should be doing.
Adding Weight Too Fast
This isn’t technically a form error — it’s the reason form errors happen and persist. The gym culture of “progressive overload at all costs” has convinced many beginners that adding weight every session is the primary goal. Form is treated as a secondary concern, something to tighten up “later” once the weight is already heavy enough that fixing it is genuinely difficult.
Good squat mechanics need to become automatic — ingrained at the neurological level — before significant load is added. That takes time and repetition at lighter weights. The athletes who master technique early, who spend months building a movement foundation before chasing numbers, almost universally become the strongest squatters long-term. The ones who rush load accumulate pain, injury, and compensations that take years to unravel.
Squat Variations: Where to Start & Where to Go
Not everyone should start with a barbell back squat. Here’s a logical progression from foundational to advanced, with each variation building the movement quality and strength required for the next.
Learn It Right.
Once.
The squat is one of the most rewarding lifts to master — and one of the most punishing when done badly over time. The investment of learning proper mechanics now, before loading becomes heavy enough to matter, pays dividends for years. Fewer injuries, greater strength gains, better transfer to sport and everyday life.
If you took one thing away from this guide, let it be this: there is no shame in a lighter barbell. The person squatting 60kg with textbook form is doing more for their long-term strength and health than the person squatting 120kg with a caving spine and a rising heel. Master the pattern. Then load it.
Work through the mistakes checklist honestly. Film yourself. Get feedback. And give the movement the time it deserves before rushing toward heavier numbers.