Open water athletes make expensive wetsuit mistakes because they shop by brand before they understand what they actually need. This guide covers every decision point (thickness, fit, construction, buoyancy, and price) so you buy the right suit the first time.
Why Wetsuit Choice Actually Matters for Performance
A poorly fitted or wrong-thickness wetsuit does not just make you cold. It restricts your shoulder rotation, kills your stroke efficiency, and drains energy you need for the rest of a race or session. Open water swimming demands a different kind of endurance than pool work, and your suit plays a direct role in how sustainable your effort is across distance.
Buoyancy lift from a well-fitted wetsuit can reduce your drag and help horizontal body position without conscious effort. That translates directly into pace. A suit that fights your movement does the opposite.
The Different Types of Open Water Athlete and Which Suit Fits Each
Before looking at any specific product, identify which category describes you.
Triathlon Swimmers
Triathletes need maximum flexibility through the shoulders and a suit that strips off fast in T1. Triathlon-specific wetsuits use thinner neoprene across the arms and shoulders (typically 1.5–2mm) while adding thicker panels at the core for buoyancy. They also include smooth-skin coatings that release quickly when you pull the zip. If you race in IRONMAN or any sanctioned triathlon, your suit must comply with water temperature rules. Legal above 24.6°C is a hard cutoff in most races.
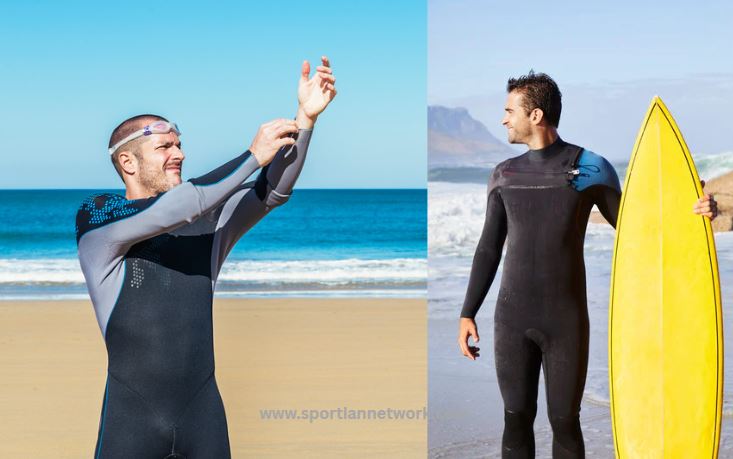
Open Water Swimmers (Non-Race)
Recreational open water swimmers and sea swimmers prioritize warmth over speed. A 5mm full suit with taped seams handles cold water far better than a race-cut triathlon suit. You are not pulling it off in a transition zone, so thermal protection matters more than hydrodynamics.
Surfers
Surfer wetsuits are built for flex during paddling and durability against board contact. They differ significantly from swim-specific suits. If you are reading this as a surfer, the thickness guide below applies, but the construction details around seam taping and panel placement are different for surf-oriented suits.
Wild Swimming Enthusiasts
Cold water dipping and open water wild swimming have exploded since around 2021. If you swim in lakes, rivers, or the sea year-round, you need a suit designed for immersion rather than speed. Thermal rating matters more than anything else here.
Understanding Neoprene Thickness
Thickness is measured in millimetres and written as a dual number; for example, 4/3 means 4mm on the body, 3mm on the limbs. Here is how to read the numbers against conditions.
Thickness by Water Temperature
Above 22°C: A shorty (short arms, short legs) or no wetsuit at all. Many triathlon rules actually prohibit wetsuits at these temperatures.
18–22°C: A 2mm or 3/2mm full suit provides light thermal protection without overheating. This range suits most UK summer open water swimming and warmer Mediterranean conditions.
14–18°C: A 4/3mm is the workhorse of the wetsuit world. This is the most common choice for UK, Irish, and northern European athletes who swim spring through autumn.
10–14°C: Move to 5/4mm or 5/4/3mm with sealed seams. At this temperature range, cold water shock becomes a real risk for unprotected swimmers.
Below 10°C: A 6/5mm or drysuit territory. Add a hood, gloves, and booties. Wild swimmers who go year-round in northern climates need to treat this range seriously.
Seam Construction: Where Most Buyers Go Wrong
The seam type determines how waterproof and flexible a suit is. Budget suits cut corners here first.
Flatlock stitching is the most basic construction. Thread passes through both panels, leaving tiny holes. Fine for warmer water but allows water ingress in colder conditions. Common in entry-level suits.
Blind-stitched seams use glue and a curved needle that does not penetrate fully, creating a near-waterproof join. A significant step up.
Blind-stitched and liquid-taped seams add a tape layer over the inside of the seam. This is what serious cold water suits use. It eliminates flushing almost entirely.
Welded seams bond panels with heat or ultrasound. Found on higher-end triathlon suits where weight and drag reduction matter.
If you are swimming in water below 15°C regularly, blind-stitched and taped seams are non-negotiable. The difference in heat retention is immediate and significant.
Fit: The Variable That Determines Everything Else
A correctly fitted wetsuit feels uncomfortably tight when you are dry and standing still. That is normal. When you are horizontal in water, the neoprene relaxes slightly and blood flow warms the thin water layer trapped against your skin.
Common fit mistakes:
Too long in the torso causes the suit to pull down on your shoulders and restrict arm elevation. Swimmers feel this as a burning resistance during the catch phase.
Too loose around the neck allows constant water flushing and heat loss. The collar should seal against the skin without choking.
Too short in the leg pulls the suit upward out of the water, shifting panels away from where they are designed to sit.
Most manufacturers run their own sizing charts. Use them, not generic small/medium/large assumptions. Measure your chest, waist, hips, and weight. If you fall between sizes and you have a larger torso relative to your height, size up. If you have longer limbs relative to your torso, size down.
Buoyancy Panels and Where They Matter
Triathlon-specific suits place thick neoprene at the hips and lower back to lift the legs. This corrects the sinking position that non-swimmers often default to and makes kicking less critical for body position.
For open water swimmers with strong technique, aggressive buoyancy panels can feel unnatural and actually interfere with a well-balanced stroke. Many experienced open water athletes prefer lower-profile suits without exaggerated lift panels for exactly this reason.
Check where the panel placement sits relative to your natural stroke mechanics. If you already swim flat in the water, a suit with extreme lift at the hips may push you into an arched position that adds drag rather than reducing it.
Price Tiers and What You Actually Get
Entry Level: Under $200 / £150
You get flatlock seams, basic neoprene, and a suit that works for occasional use in moderate water temperatures. Fine for beginners testing open water swimming or someone who races once a year. Expect 2–3 seasons of regular use before the neoprene degrades.
Mid Range: $200–$450 / £150–£350
Blind-stitched construction, better neoprene quality with improved stretch, and more considered panel placement. This is where most serious recreational athletes should spend. Suits in this range handle UK and northern European conditions well for multiple seasons.
Performance: $450–$800 / £350–£600
Engineered neoprene, welded or taped seams throughout, hydrodynamic coatings, precision panel placement, and fast-release zipper systems. Aimed at competitive triathletes and open water racers where every second matters. Yamamoto #40 cell neoprene appears at this tier. It is noticeably lighter and more flexible than standard neoprene.
Elite: Above $800 / £600+
Marginal gains territory. The jump from performance to elite is smaller than the price suggests. Unless you are racing at a high competitive level where seconds across a 3.8km swim are meaningful, the mid-to-performance tier delivers 90% of the performance benefit.
The Zipper Question: Back Zip vs Chest Zip
Back zip suits are easier to get on and off. The zip runs down the back, making them faster in T1 for triathletes. The trade-off is a slightly larger gap at the neck that allows more water entry.
Chest zip suits seal better at the neck and allow more freedom of shoulder movement. Getting into one takes practice: the entry is through the chest panel and feels awkward until you develop the technique. For pure swimmers, chest zip is generally the better choice.
For triathletes doing their first season, back zip is more forgiving. For experienced racers who have done T1 hundreds of times, chest zip is worth learning.
Accessories That Change the Experience in Cold Water
If you swim below 12°C regularly, the suit alone is not enough. Your hands, feet, and head account for significant heat loss.
Neoprene gloves (3–5mm) make an enormous difference to hand function and overall perceived warmth. Many cold water swimmers say gloves have a bigger comfort impact than anything else.
Booties prevent foot cramps and protect against the thermal shock of stepping onto cold sand or rock. A 3mm bootie handles most conditions.
Hood: A separate neoprene hood or a hooded wetsuit eliminates the fastest heat loss pathway. Once you have swum with a hood in cold water and without one, you will not go back.
If you are already consistent with cold exposure work, the principles behind cold water immersion for recovery and acclimatisation are covered in detail at Cold Water Immersion for Athletes. You may tolerate colder temperatures without full accessories. But for most athletes, kit up properly.
Maintenance: How to Make a Wetsuit Last
Rinse in fresh water immediately after every use. Salt and chlorine degrade neoprene faster than anything else. Let it dry inside-out in shade. UV light breaks down neoprene over time. Never put it in a tumble dryer or leave it folded in a bag. Hang it over a wide hanger or a dedicated wetsuit bar, not a thin wire that creases the neoprene.
Wetsuit-specific shampoo once a month removes bacteria and keeps the neoprene supple. A small tube of neoprene repair glue handles small tears before they become large ones.
How to Test a Wetsuit Before Buying
If you are spending over $300, do not buy blind. Most wetsuit retailers allow pool testing, and some tri clubs run loan schemes. Key checks during a pool test:
Swim 200m and note whether your shoulder rotation is restricted. If you feel resistance at the top of your catch, the suit is too tight across the arms or the arm panel is too thick.
Check the neck seal after 200m of movement. If water is flushing in continuously rather than just the initial fill, the neck fit is wrong.
Lie face down and check your natural body position. A well-fitted suit with appropriate buoyancy panels should level your hips without forcing you into an arched back.
Internal Links
For athletes using wetsuits as part of a broader triathlon or open water training setup, maintaining consistent aerobic base work through the off-season makes a real difference to race-day swim fitness. The full breakdown on building that base without junk volume is at Aerobic Base Building: Why Slow Running Makes You Faster.
Shoulder health is worth monitoring for regular open water swimmers. If you are logging high volume in the water and noticing any shoulder discomfort, the rotator cuff exercise guide at Rotator Cuff Exercises: The Complete Fix for Weak Shoulders is worth reading before the problem becomes an injury.
Quick Buyer Checklist
Before finalising any wetsuit purchase, confirm:
Water temperature range you will actually swim in, not the warmest session, the coldest.
Seam construction appropriate for that temperature.
Fit measured against the brand’s own sizing chart, not generic sizing.
Zipper style matched to your use case (triathlon transition vs pure swimming).
Budget tier matched to your frequency and competitive level.
Accessories needed for the bottom of your temperature range.